Kubernetes is an open-source container orchestration platform that automates containerized applications’ deployment, scaling, and management. Google developed it, and is now maintained by the Cloud Native Computing Foundation (CNCF). According to Gartner, AWS EKS (Elastic Kubernetes Service) is quickly becoming one of the most popular options for deploying a Kubernetes cluster in the cloud.
Deploying Kubernetes on AWS EKS provides many benefits, including increased security, scalability, and ease of management. With EKS, organizations can focus on their applications and leave the management of Kubernetes to AWS. The future of Kubernetes deployment with AWS EKS looks promising as more and more businesses are turning to cloud-based solutions to address their container security needs.
With the ability to integrate with other AWS services, such as CloudFormation and Elastic Load Balancing, deploying a Kubernetes cluster on EKS can open up many new business opportunities for organizations of all sizes.
We make a k8s cluster, making it easy to deploy, manage, and scale containerized applications using Kubernetes on AWS Cloud. Follow the steps below to deploy your Kubernetes cluster using AWS efficiently. This blog is a comprehensive guide to help you quickly deploy your cluster.
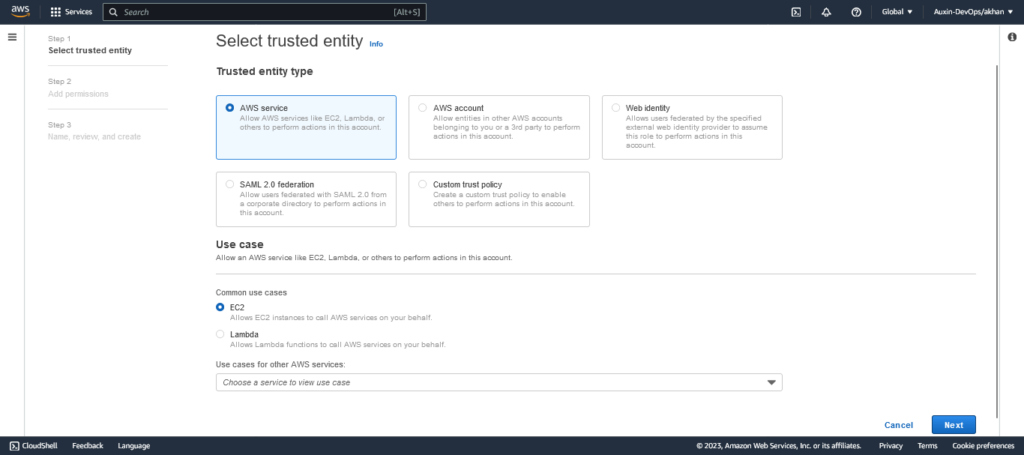
Step 1: Create an AWS EKS Role.
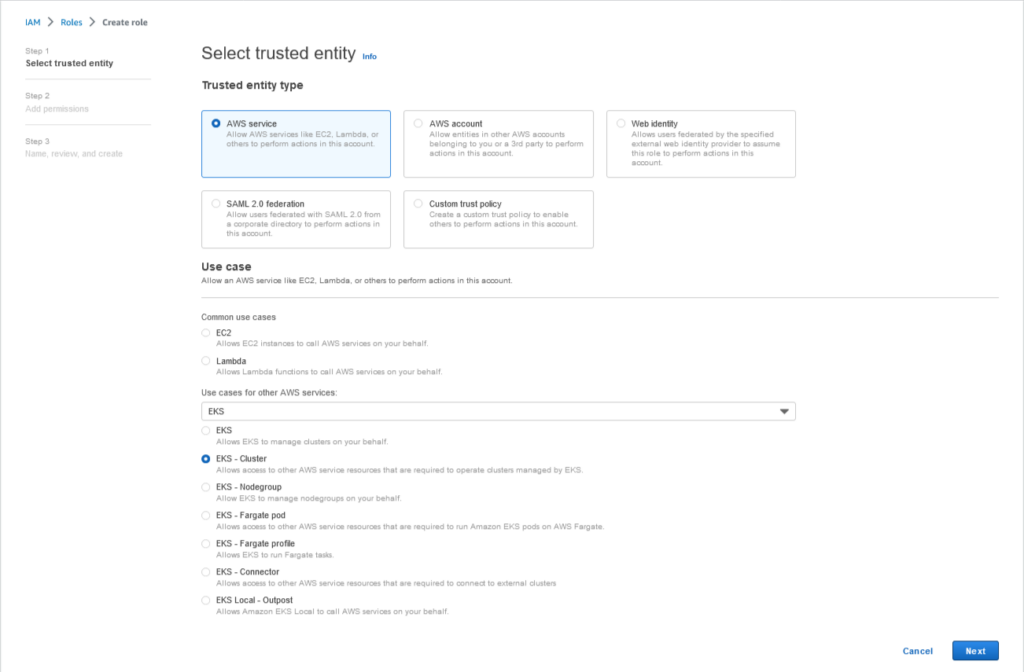
The First Step is to create an EKS role that Kubernetes can assume to provide the required resources. To form the EKS Role, log in to the AWS Management Console, Click on Role, and click Create Role. Select EKS under AWS Services, Click on EKS Cluster, and click Next.
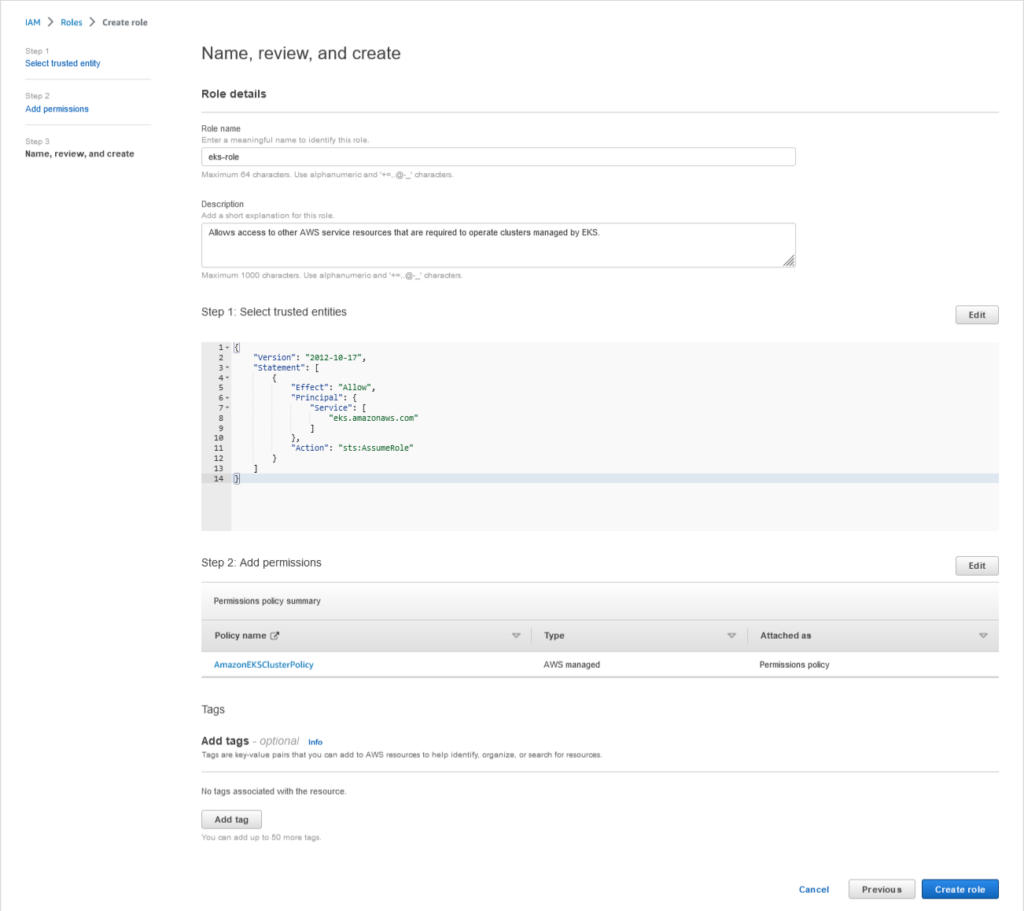
By default, it will Select 1 Custom Policy for the Role, Which is,
- AmazonEKSClusterPolicy
Click Next: Review
Provide the Role Name and Click Create Role.
Step 2: Create VPC for EKS Cluster.
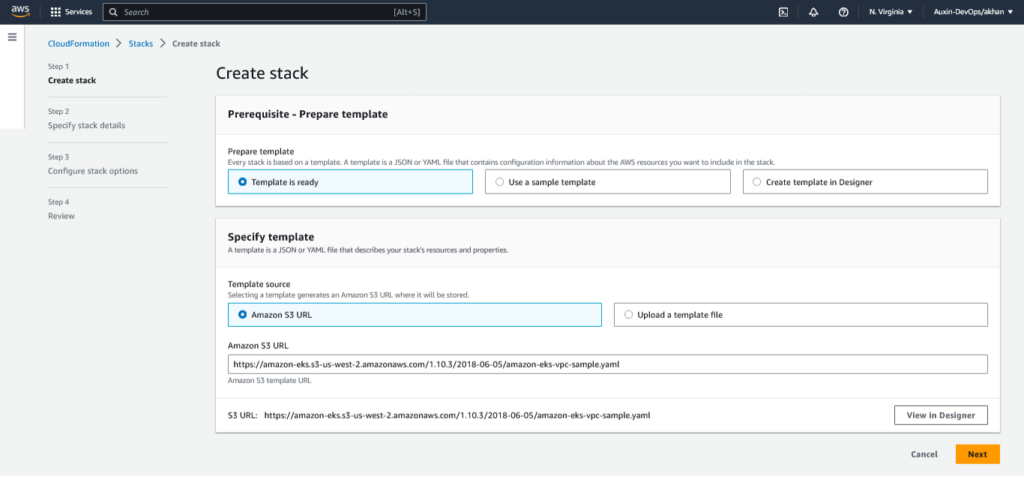
As we have completed the Role Creation, currently we’ll be making VPC for Cluster resources. We will use Cloudformation Script to create a VPC Stack. Now Move to the CloudFormation Section and Click on Create Stack. Click on Specify an Amazon S3 template URL, paste the below Link (Cloudformation Template), and Click Next.
https://amazon-eks.s3-us-west-2.amazonaws.com/1.10.3/2018-06-05/amazon-eks-vpc-sample.yaml
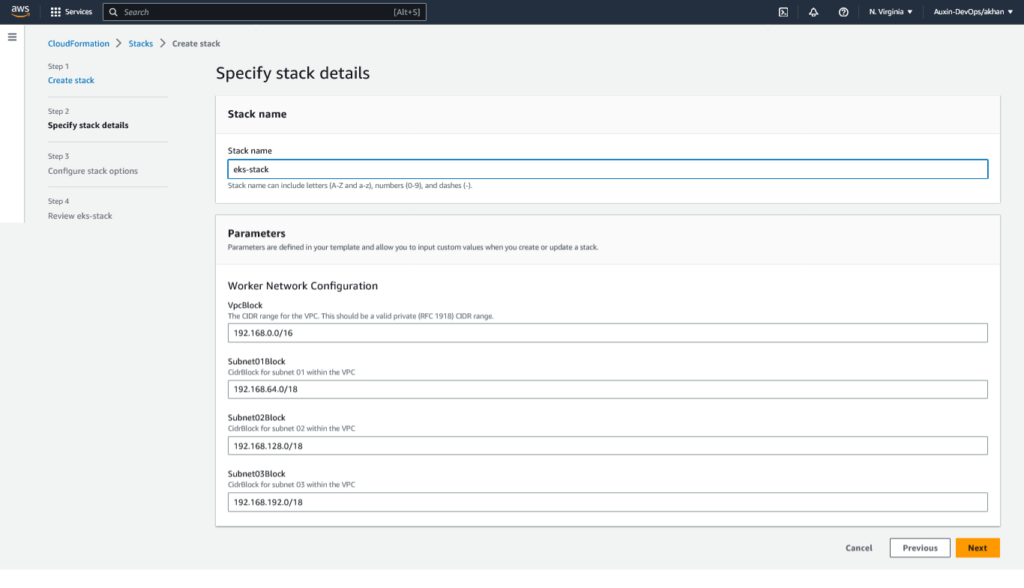
Provide the Stack Name, fill out the parameters required for VPC Stack, and Click Next. Review the details and Click on Create. Cloud formation Stack for VPC will Initiate and be created in a few mins.
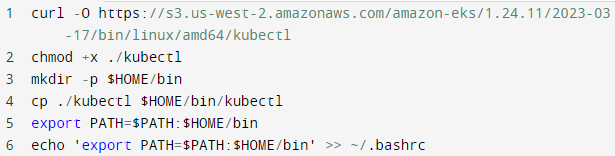
Step 3: Install and configure kubectl for EKS Cluster
The EKS Cluster always requires Kubelet and Kubectl to allow IAM permissions for the Kubernetes cluster. You can install either the Amazon EKS-amended version of kubectl or directly from the Kubernetes documentation.
Note: We will launch a t2.micro instance and use it as a Kubernetes client. Launch the instance (Amazon AMI Preferred) and configure AWS CLI.
Use the below commands to install the kubectl
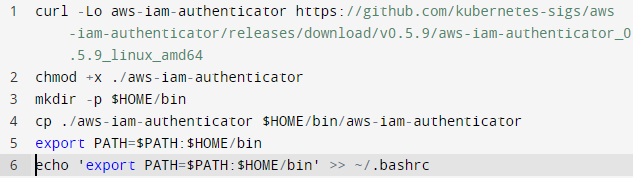
Step 4: Install aws-iam-authenticator for Amazon EKS
Use the below set of commands to install aws-iam-authenticator
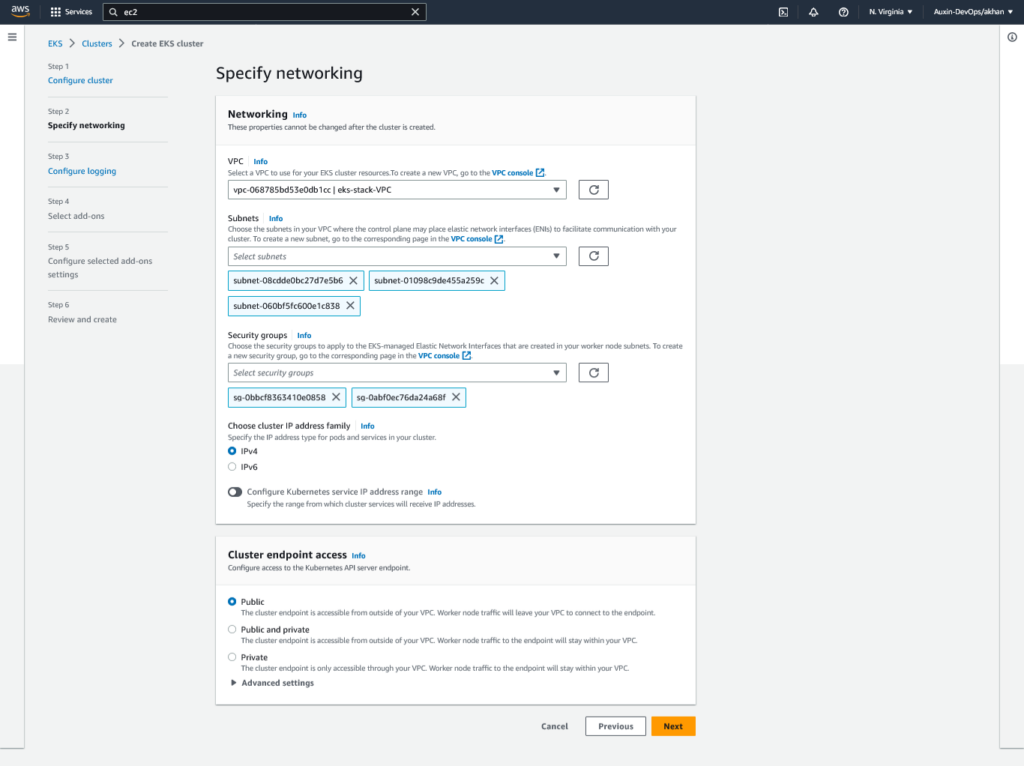
Step 5: Install AWS EKS Cluster from AWS Console
Select EKS service in the AWS Console. Provide the below details in the screenshot and click Create.
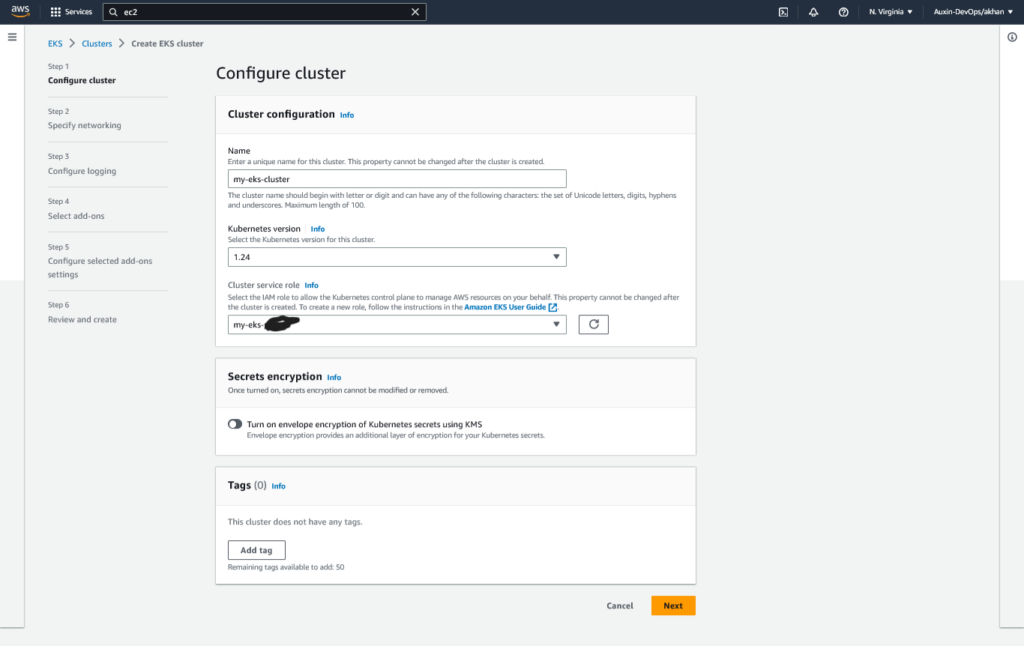
Note: Kubernetes cluster version should be 1.24.x, which needs to be matched with the kubectl client of the same version, else you can run into a version incompatibility issue, creating authentication issues with the cluster.
Review the settings and create it.
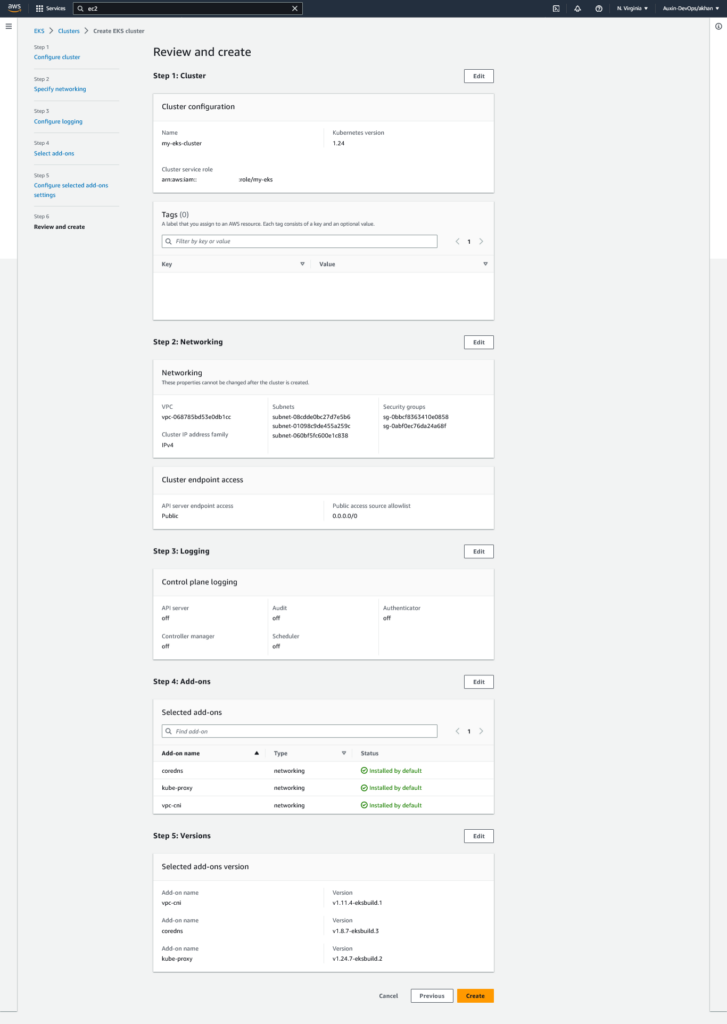
Note: It will take around 5 mins to reach a cluster in the Active State.
Step 6: Launch and Configure EKS Worker Nodes
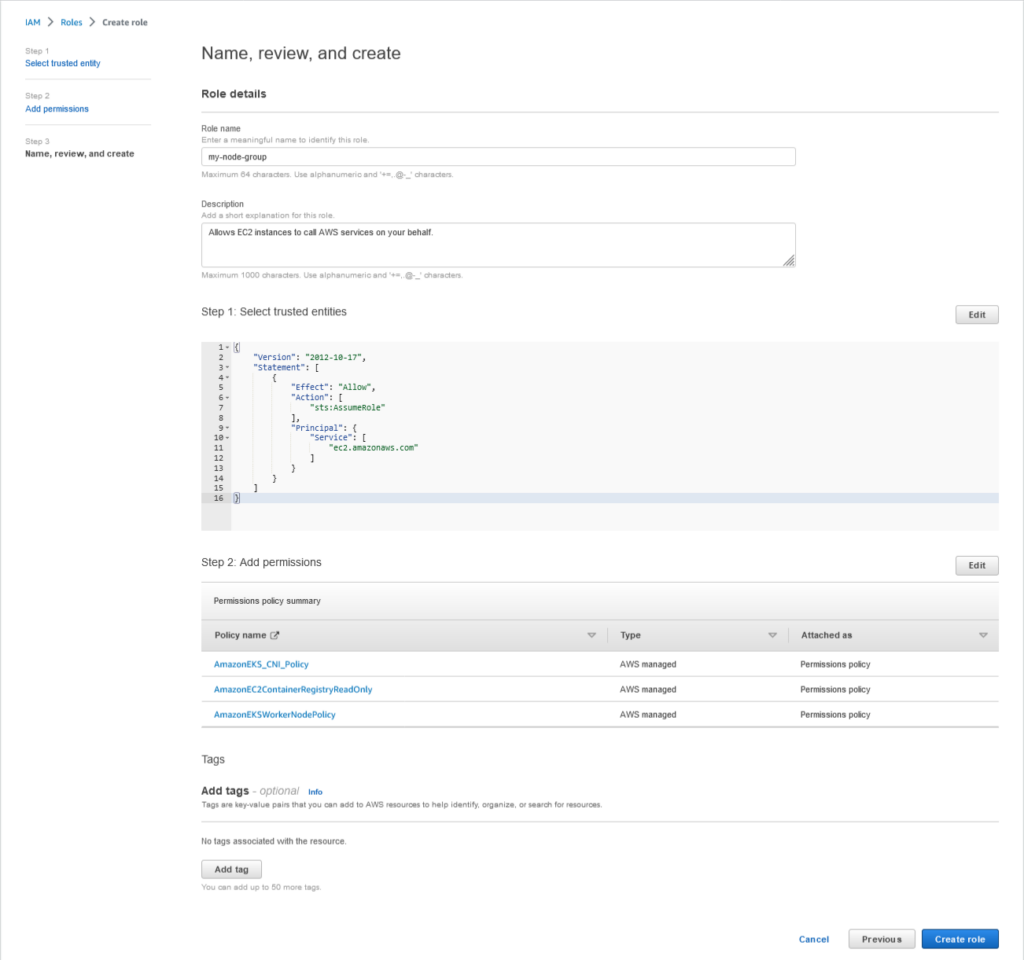
First, we create an IAM role for worked nodes, Provide the below details in the screenshot and click Create Role
Attached below are policies on this Role, and click Create.
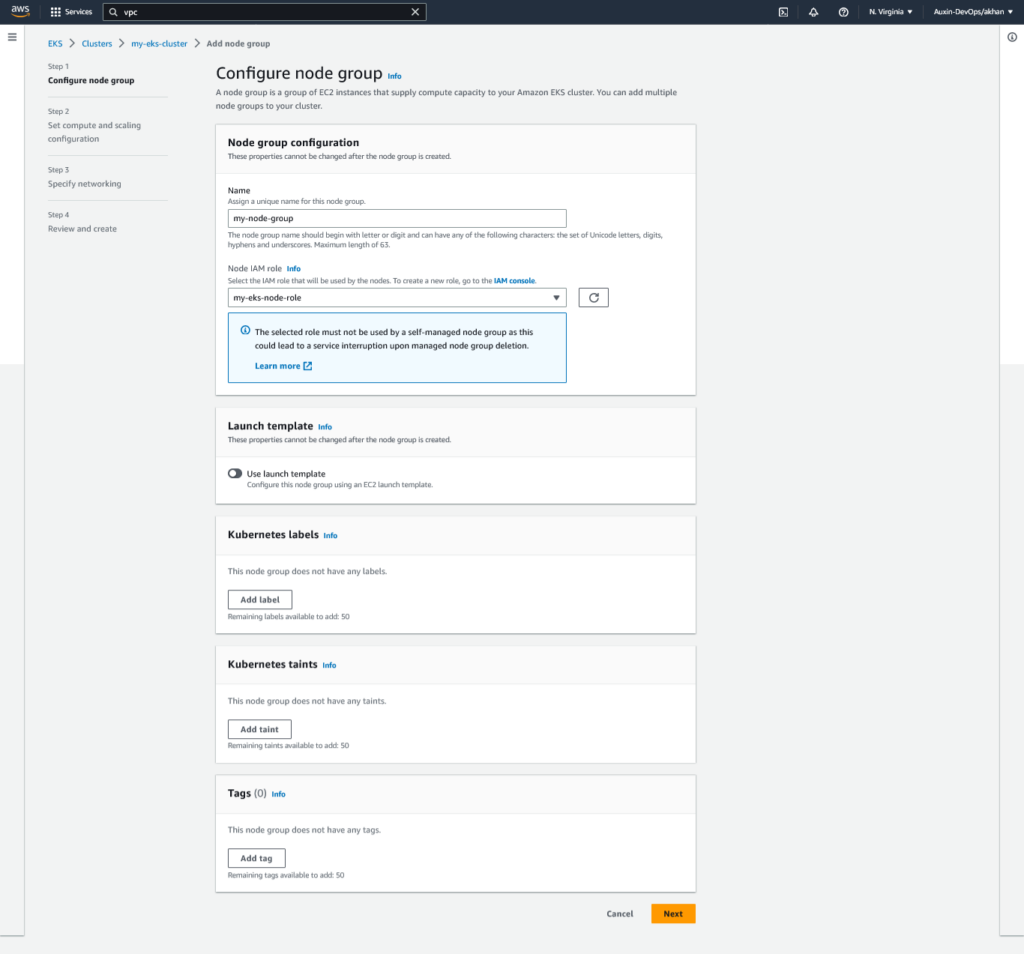
Create a Node Group in a cluster by using the below screenshot
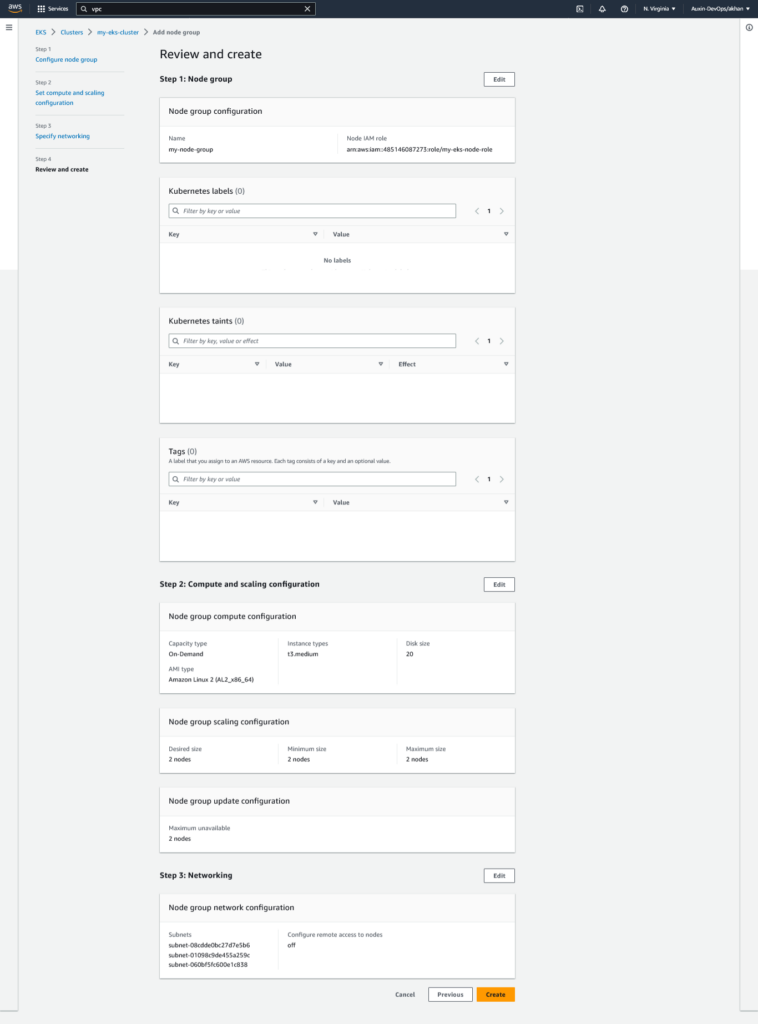
Review and create a node group. If the node group does not make, you update your VPC subnets setting to enable auto assign public ipv4 that you used VPC subnets in making node groups.
Step 7: Set up your machine to get the EKS cluster.
First, you need to add the context of your cluster by the below command.

Update your AWS credentials in ~/.aws/credentials directory for EKS Cluster authentication and run the below command to get your AWS EKS Cluster nodes.


Following the steps outlined in this blog, I hope you can successfully deploy your Kubernetes cluster on AWS and secure your containerized applications.
AlphaK8 by Auxin: The Ultimate Solution for Kubernetes Cluster Security
After thoroughly analyzing our competitors, such as Qualsys and TwistLock, Auxin has successfully developed AlphaK8, the ultimate Kubernetes cluster deployment, management, and security platform. The significant advantage that sets Auxin apart from our competitors is our support for all major K8 platforms, including EKS, GKS, and AKS.
Our platform utilizes a read-only access scan and provides comprehensive scan results to ensure your cluster is secure. Our mission is to provide a unified platform with seamless integration into the SDLC process using a CI/CD pipeline. To address concerns around privacy and confidentiality, AUXIN offers vendor and consultant modes, enabling stakeholders and company developers to have shared access to the tool.
We strive to minimize false positives while providing industry-specific scan and test results. With AlphaK8, you can confidently scale your applications while maintaining optimal security. To learn more about our exceptional services, please visit our website at auxin.io