Kubernetes is an open-source container orchestrator that automates operations’ deployment, scaling, and management. GKE (Google Kubernetes Engine) provides a highly scalable and secure platform for deploying and managing Kubernetes clusters in the cloud. Google has been at the forefront of containerization technology. With GKE, they offer a fully-managed Kubernetes service, allowing developers to focus on their applications without worrying about managing the underlying infrastructure.
According to Forbes, the future of deploying Kubernetes with GKE looks promising, with Google continuously investing in security and expanding its offerings to meet market demands. By leveraging GKE, businesses can improve their efficiency and agility, reduce costs, and use Google’s advanced machine learning and data analytics capabilities. With the growing popularity of cloud-based solutions, deploying a Kubernetes cluster with GKE can provide significant business opportunities for organizations looking to stay ahead of the curve.
A Kubernetes cluster can be created through Google Cloud Project (GCP) console. Follow the steps below to deploy your Kubernetes cluster using GKE efficiently. This blog is a comprehensive guide to help you quickly deploy your cluster.
Step-1
Deploy GKE Cluster
When using the GCP console, the following steps will let you create a Kubernetes cluster in GCP.
- Create a new project in the GCP console, or select an existing project.
- From the GCP console, go to Search from the topmost pane of the window and type Kubernetes cluster and select it.
- Enable the Kubernetes Engine API in the GCP console.
- Click Create, select the standard configuration, and add these details according to your requirements and create it.
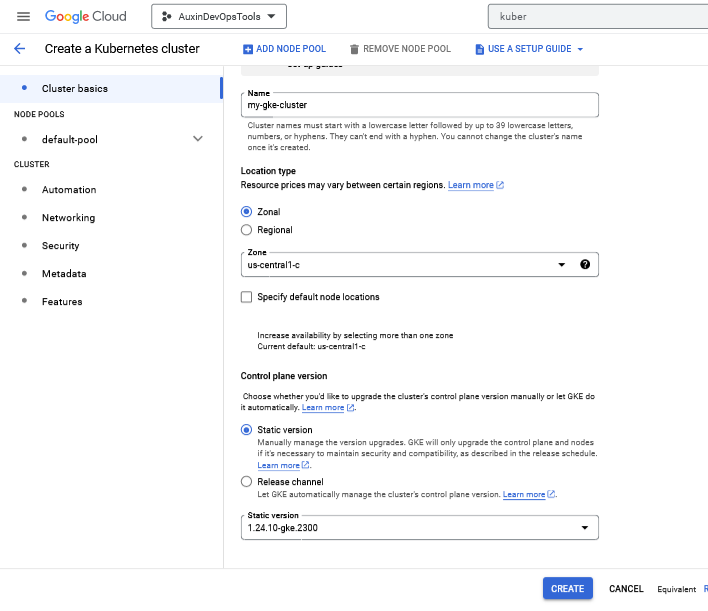
Note: Stick to the default cluster’s configurations and properties for the remaining cluster’s configurations. The Kubernetes cluster version should be 1.24.x, which needs to be matched with the kubectl client of the same version. Otherwise, you can encounter version incompatibility issues, creating authentication issues with the cluster.
Step-2
Install and configure kubectl and gcloud for GKE Cluster
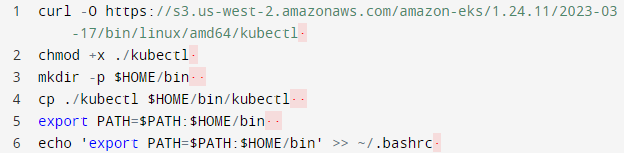
Use the below commands to install the kubectl.
Use the below commands to install the cloud.
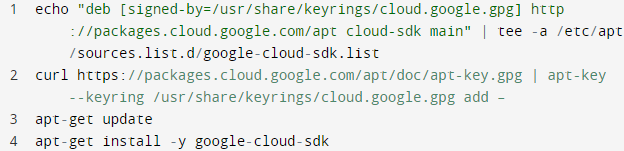
You also need to install gcloud auth plugin for authentication of GKE cluster with the below command.

Step-3
Connect to GKE Cluster
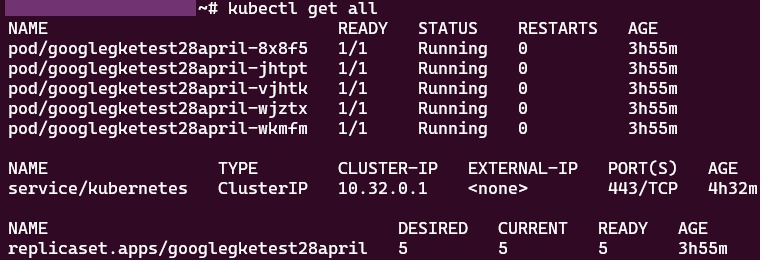
After successfully creating the Kubernetes cluster, you need to log in to your GCP portal on cli or WSL terminal and connect it.
Use the following command to get the credentials of your newly created GKE cluster and get them saved on the local machine.

Note: Replace the cluster, zone, and project names with your configurations name.
Following the steps outlined in this blog, I hope you can successfully deploy your Kubernetes cluster on GKE and secure your containerized applications.
AlphaK8 by Auxin: The Ultimate Solution for Kubernetes Cluster Security
After thoroughly analyzing our competitors, such as Qualsys and TwistLock, Auxin has successfully developed AlphaK8, the ultimate Kubernetes cluster deployment, management, and security platform. The significant advantage that sets Auxin apart from our competitors is our support for all major K8 platforms, including EKS, GKS, and AKS.
Our platform utilizes a read-only access scan and provides comprehensive scan results to ensure your cluster is secure. Our mission is to provide a unified platform with seamless integration into the SDLC process using a CI/CD pipeline. To address concerns around privacy and confidentiality, AUXIN offers vendor and consultant modes, enabling stakeholders and company developers to have shared access to the tool.
We strive to minimize false positives while providing industry-specific scan and test results. With AlphaK8, you can confidently scale your applications while maintaining optimal security. To learn more about our exceptional services, please visit our website at auxin.io