Practical Guide: Getting Started with SAST
What is SAST?
SAST, short for Static Application Security Testing, entails examining an application’s source code to detect potential security weaknesses before they pose risks to your organization. SAST tools and scanners function during the initial phases of software development, empowering developers to pinpoint and fix security flaws even before the application undergoes complete compilation. This methodology provides immediate insights and expedites the discovery of vulnerabilities, optimizing the development workflow.
Benefits of SAST
SAST presents numerous benefits compared to alternative security testing approaches:
Rapid Analysis: SAST tools offer a swift and comprehensive examination of an application’s entire codebase. Seamlessly integrating into the development workflow, these tools facilitate efficient detection of vulnerabilities and ensure robust code security.
Enhanced Precision: Automated systems elevate the precision of vulnerability detection by swiftly identifying threats like cross-site scripting, buffer overflows, and SQL injection. Outperforming human developers in accuracy and speed, these systems meticulously scour the codebase, leaving no stone unturned in the quest for enhanced security.
Immediate Feedback: SAST tools provide developers with instant insights into code issues, offering real-time feedback that simplifies the debugging process. By streamlining the identification of errors and vulnerabilities, these tools contribute to reducing overall development time, allowing for more efficient and effective software creation.
Broad Language Support: SAST tools boast broad compatibility across multiple programming languages and platforms, guaranteeing accessibility within diverse development environments. This expansive language support enables developers to leverage the benefits of SAST analysis regardless of the technology stack they employ, fostering inclusivity and adaptability in software security practices.
Practical Guide
We’re about to delve into a practical guide on conducting SAST scans. If you’re interested in utilizing AlphaScale for this purpose, you can sign up through the following link: https://portal.auxin.cloud/signup. There is no cost associated with scanning your code. and there’s no cost associated with scanning your code. If you haven’t registered yet, simply visit the provided link and log into your account.
Get Started
Upon logging in, you’ll see a display showcasing a range of options.Among these, you’ll find AlphaScale, which you’ll click to access. Once selected, you’ll be directed to the AlphaScale dashboard, where you can navigate through the available features and functionalities.
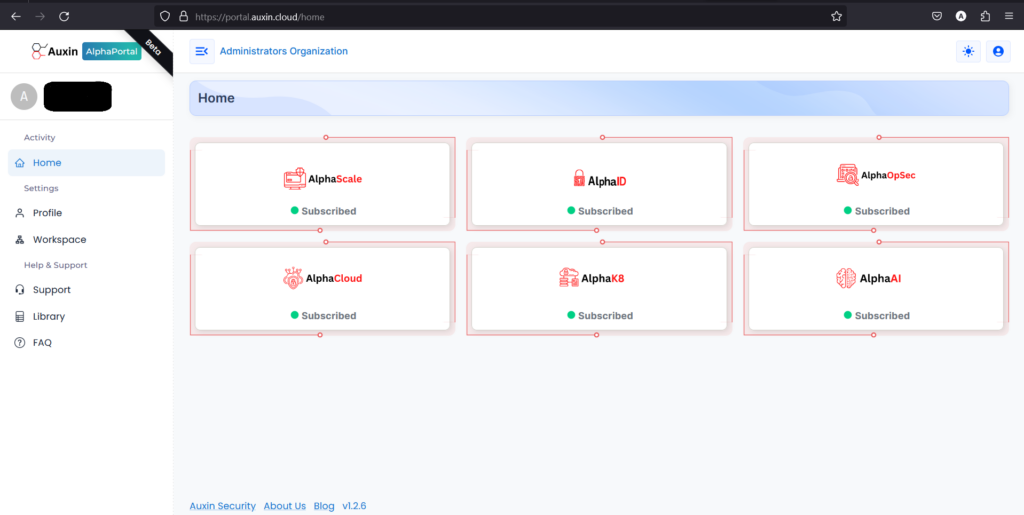
The dashboard serves as a comprehensive hub, providing insights into vulnerabilities, trends, application risks, and their severity levels. Users can quickly assess the security posture of their applications, prioritize actions based on severity, and stay informed about emerging threats. This centralized interface enhances decision-making by presenting crucial data in a digestible format, enabling proactive risk mitigation strategies.

Create Workload
The purpose of creating a workload is that teams can systematically organize and manage various components, application risks, and scans. Ultimately, the creation of a workload fosters a structured and disciplined environment within DevSecOps. Here are the following steps:
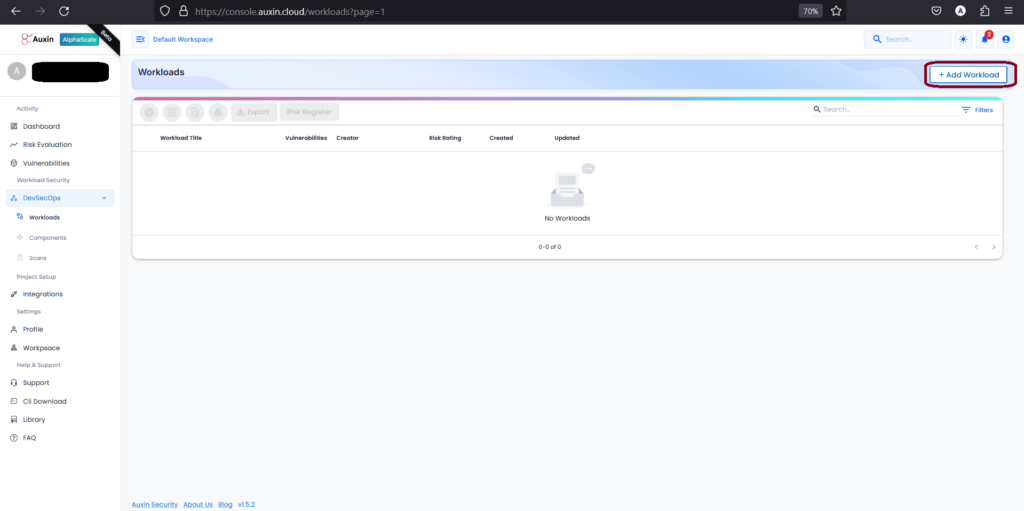
- To create a Workload, navigate to the DevSecOps section and click on “Add Workload.” This streamlined process allows users to efficiently allocate resources and manage tasks within their development and security operations.
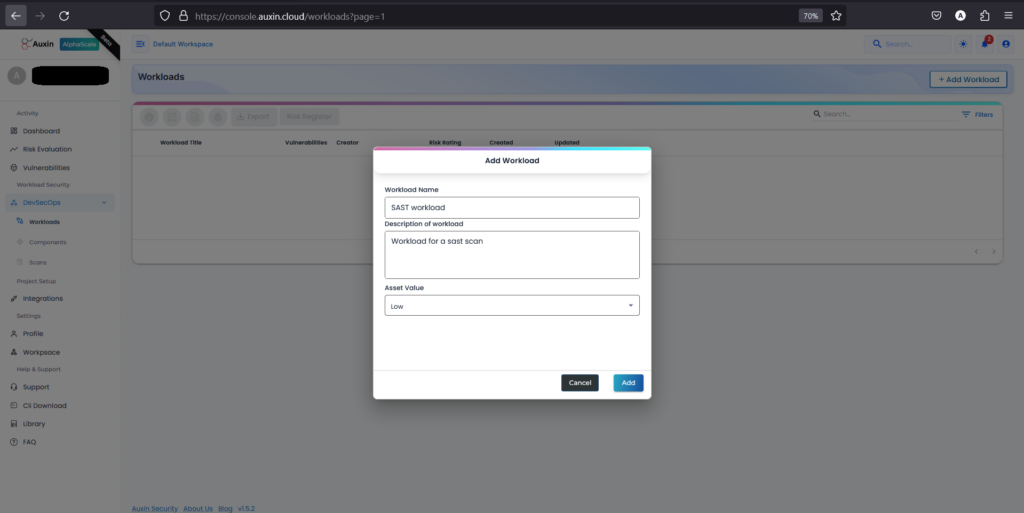
- To create a new Workload, input the desired Workload Name, Description, and Asset Value, then proceed by clicking on the “Add” button. This straightforward process ensures clear identification and categorization of tasks or projects, facilitating effective management and allocation of resources within the workflow.
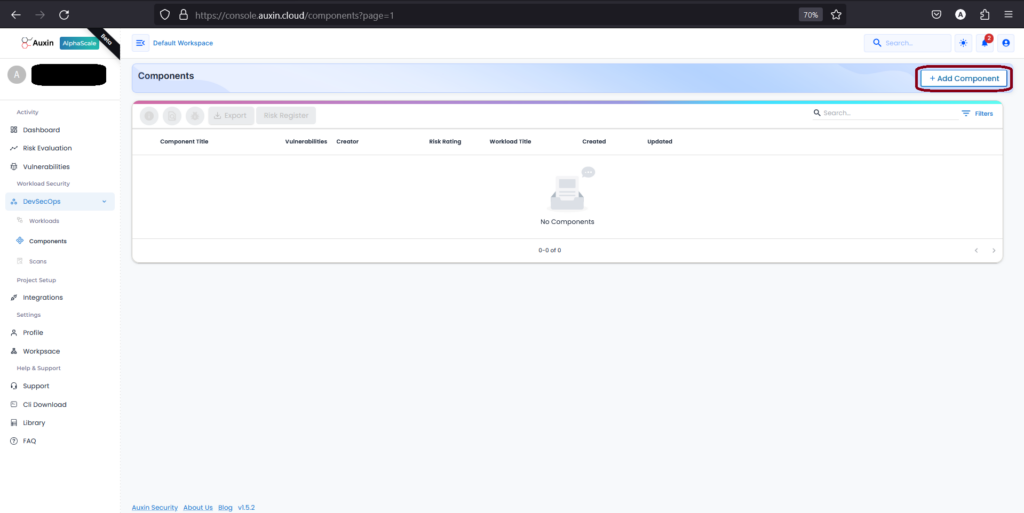
Create Component
The purpose of creating components within the workload ensures accurate representation and efficient management of scans vulnerabilities, facilitating seamless DevSecOps processes. Here are the following steps:
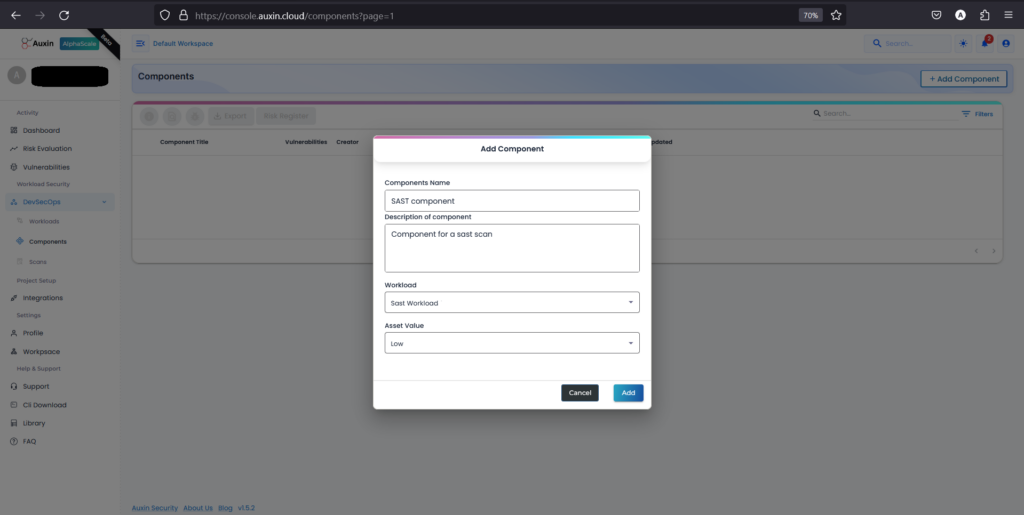
- To create a Component, access the designated section and select “Add Component.” This straightforward action enables users to efficiently incorporate new elements into their projects or systems.
- To create a Component, input its Name and Description, then choose the previously created Workload along with the designated Asset Value before clicking “Add.” This systematic approach ensures accurate identification and allocation of components within the project framework, facilitating streamlined project management and resource allocation.
Create Scan
The purpose of creating a SAST scan is to analyze the source code for vulnerabilities systematically. By initiating this scan, developers can identify and rectify security flaws early in the development process, ensuring a more secure and resilient application upon deployment. Here are the following steps:
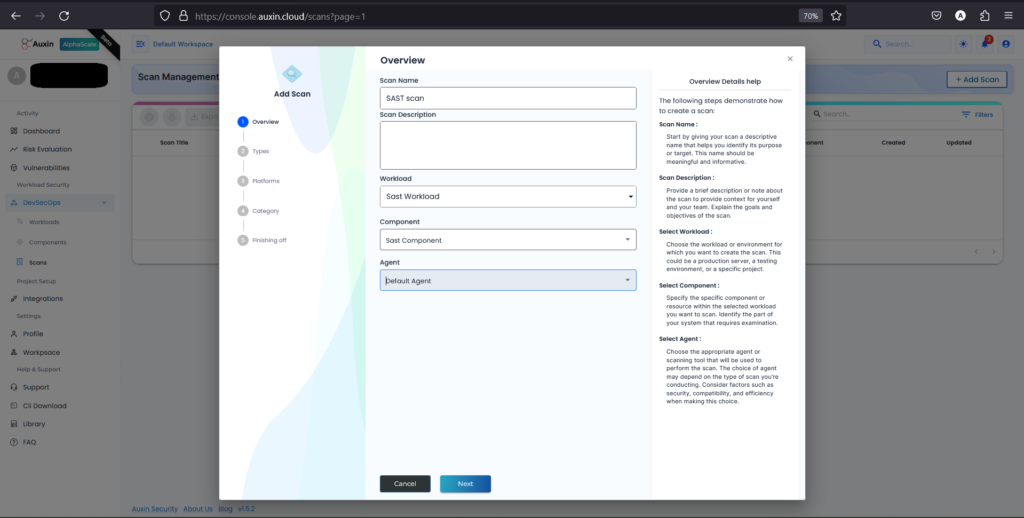
- To initiate a scan, navigate to the Scans section and select “Add Scan.” This straightforward process allows users to define scanning parameters

- To create a scan, provide a descriptive Scan Name and Description, then choose the previously established Workload and Component. Select the default Agent or specify a preferred one, then proceed by clicking “Next.” This process ensures targeted scanning of specific components within designated workloads, facilitating comprehensive security assessments and vulnerability detection.
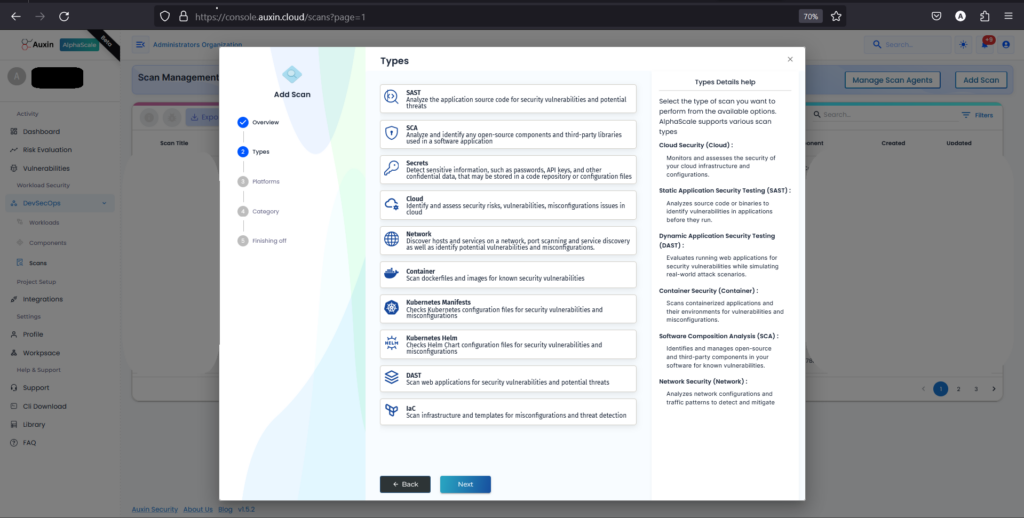
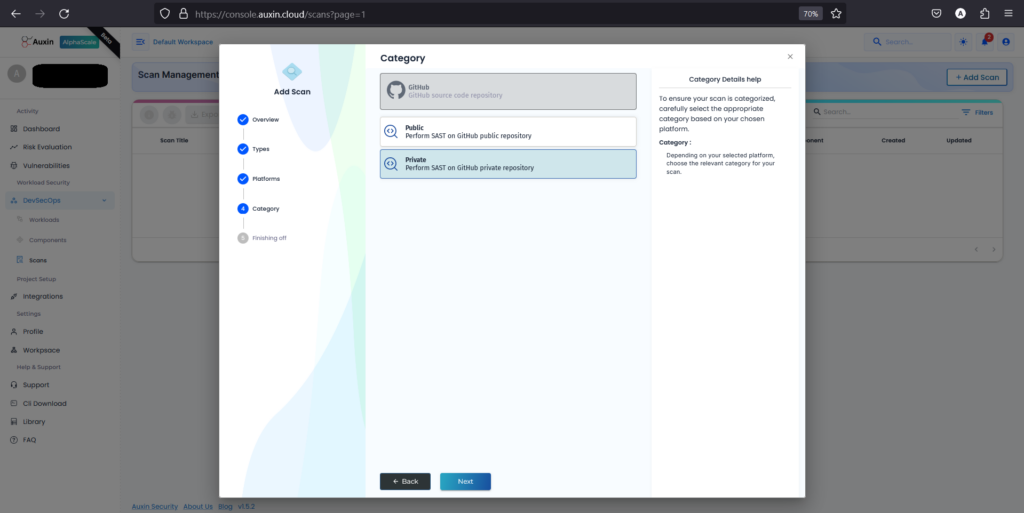
- Choose the scan type, currently set as SAST, then proceed by clicking “Next.” This selection ensures that the scanning process focuses on static analysis of the codebase, identifying potential security vulnerabilities within the application’s source code.
- After selecting SAST as the scan type, choose the platform where your SAST code resides, and proceed by clicking “Next.” This step ensures that the scanning process targets the correct repository or environment where the code is stored, facilitating accurate analysis and detection of security vulnerabilities.

- After choosing GitHub as the platform for SAST code, select “Private” to indicate that the repository is not publicly accessible, then proceed by clicking “Next.” This ensures that the scanning process can access and analyze the code stored in your private GitHub repository securely.
- Enter the Branch Name corresponding to the branch of your code repository you want to scan, then provide the Token for authentication and the private repository URL. After ensuring the accuracy of the provided information, click on “Run Scan” to initiate the scanning process.

- Upon completion of the scan, review the generated report to identify vulnerabilities within your SAST code. This comprehensive analysis provides insights into potential security risks, enabling you to prioritize and address issues effectively.
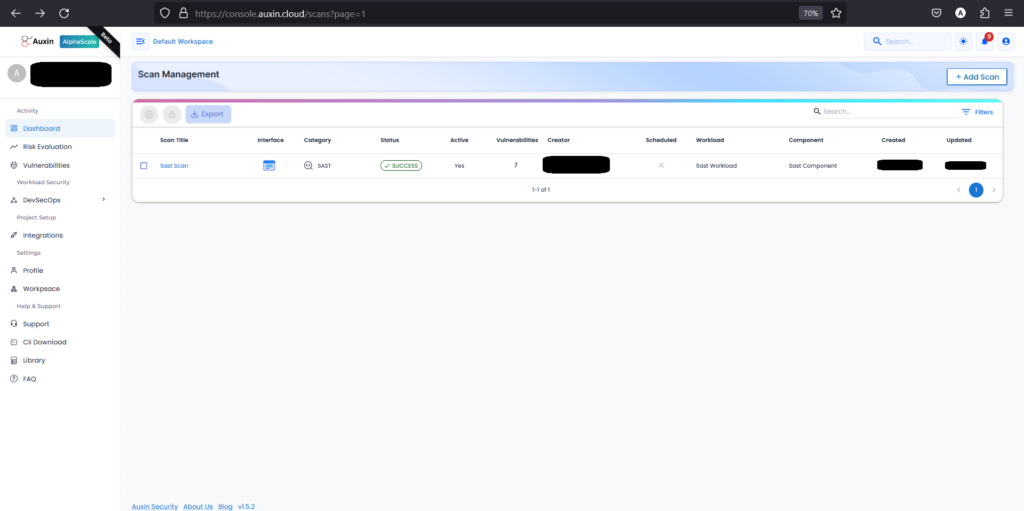
- To review SAST scan results, access the scan management dashboard, locate your scan title, and click to Scan title report. Identify vulnerabilities by severity, prioritize fixes, and collaborate with teams to address security risks efficiently.
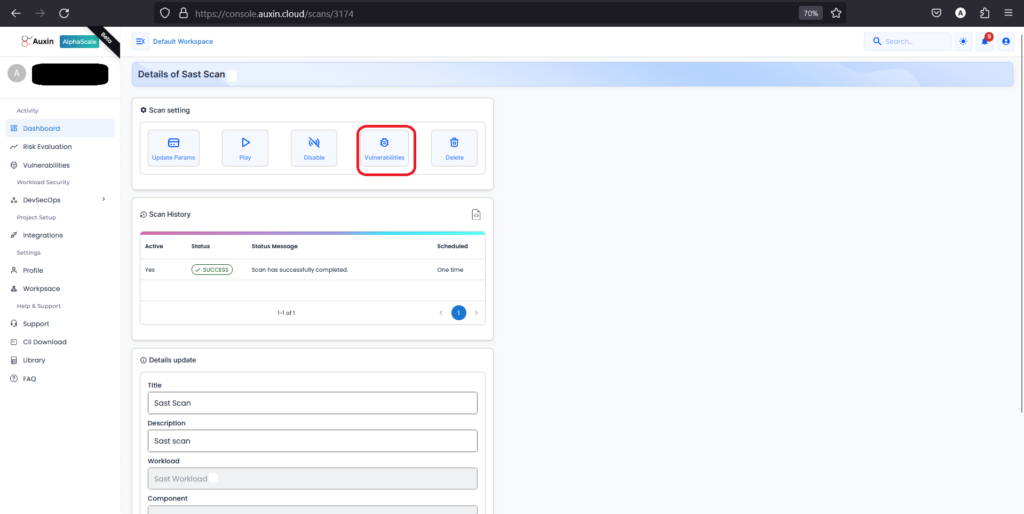
- Next, within the details of your SAST scan, locate and click on the option specifically labeled “Vulnerabilities” to access a comprehensive list of the security issues detected during the scan.
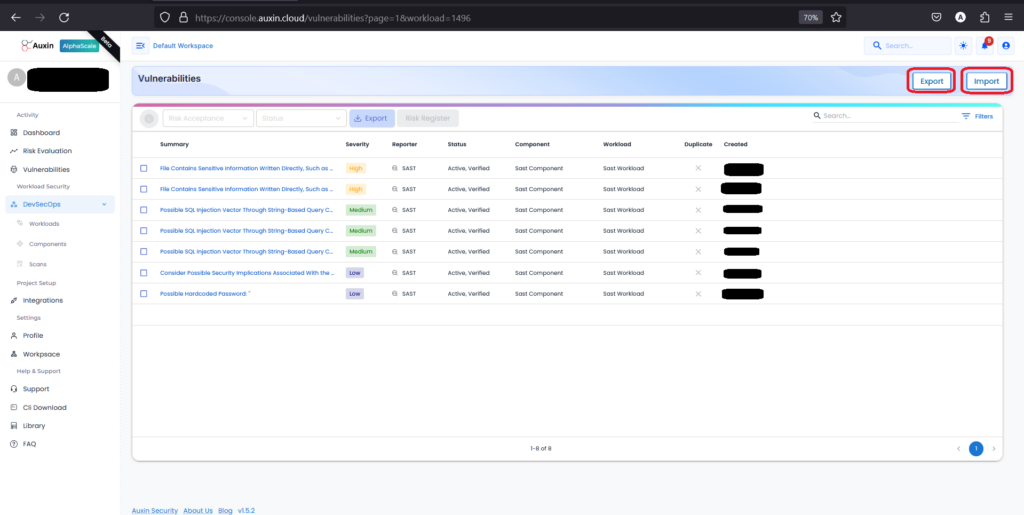
- After identifying vulnerabilities in your SAST code, you have the option to export or import them for further analysis or integration with other tools.
What to do Now – Prioritize and Remediate Vulnerabilities:
Review Findings: Carefully analyze the vulnerabilities identified by the SAST scan. For each vulnerability, assess the severity level (critical, high, medium, low) and the potential impact on your application. Based on our example, consider a high-severity vulnerability (File Contains Sensitive Information Written Directly, Such as Usernames, Passwords, Keys, etc..) involves directly including sensitive information such as usernames, passwords, or encryption keys within the codebase. If exploited, this vulnerability could lead to unauthorized access to sensitive data.
Prioritize Risks: First, address the most critical vulnerabilities. These vulnerabilities pose the most significant security risk and warrant immediate attention. Based on our example, when prioritizing risks, high-severity vulnerabilities such as this one typically warrant immediate attention due to the potential impact on the application’s security. Unauthorized access to sensitive information can lead to various security breaches, data leaks, and compromises, potentially resulting in severe consequences for the application and its users.
Remediation Steps: Develop a plan to fix the identified vulnerabilities. This may involve modifying code, implementing additional security measures, or updating external libraries. Based on our example, implementing these steps helps mitigate the risk associated with hardcoded sensitive information in the codebase.
- Identify Sensitive Data: Locate all instances of sensitive information hardcoded in the codebase.
- Secure Storage: Replace hardcoded data with secure storage methods like environment variables, configuration files, etc.
- Encryption: Encrypt sensitive data if it must be stored within the codebase.
- Access Controls: Implement access controls to restrict sensitive data access.
- Dynamic Secrets: Use dynamic secrets management to reduce exposure risks.
- Regular Audits: Continuously monitor and audit the codebase for new instances of hardcoded data.
- Developer Training: Educate developers on secure coding practices and risks.
- Automated Scans: Integrate security scanning tools into the development pipeline.
- Security Reviews: Conduct regular security reviews to identify vulnerabilities.
- Documentation: Document remediation steps and ensure compliance with standards.
Verification and Retesting
Once a vulnerability has been addressed, retest the code to ensure the fix is effective. This iterative process guarantees that your application remains secure. Based on our example, these steps are implemented to verify and retest the vulnerability.
- Verify Remediation Implementation: Verify the fix has been correctly applied according to the outlined steps.
- Unit Testing: Conduct unit and integration tests to ensure proper functionality and interaction with other components.
- Security Scans: Run scans to detect any remaining sensitive data and vulnerabilities.
By incorporating this additional step, you’ll establish a clear action plan for resolving vulnerabilities and maintaining a secure codebase.
How can Auxin help you with SAST?
With Auxin, you can automate application security testing, access comprehensive security reports, and address application defects proactively before deployment. Our proficient security experts conduct vulnerability testing according to industry best practices, utilizing a range of security testing tools and proprietary vulnerability scanners to ensure thorough assessment at every application layer. Let’s get in touch with Auxin: https://auxin.io/contact-us/.
Conclusion
SAST security offers a powerful shield against vulnerabilities by analyzing code early in development. This proactive approach, known as “shifting left,” empowers developers to identify and fix security weaknesses before they become threats. By leveraging free SAST scanning tools, you gain significant advantages: swift vulnerability detection, improved accuracy, real-time feedback, and broad language support. This translates to reduced security risks, faster development cycles, lower costs, and enhanced application quality. Remember, SAST is an ongoing process. Prioritize vulnerabilities and take steps to remediate them, making SAST security a cornerstone of your development strategy for a more secure and robust software foundation.